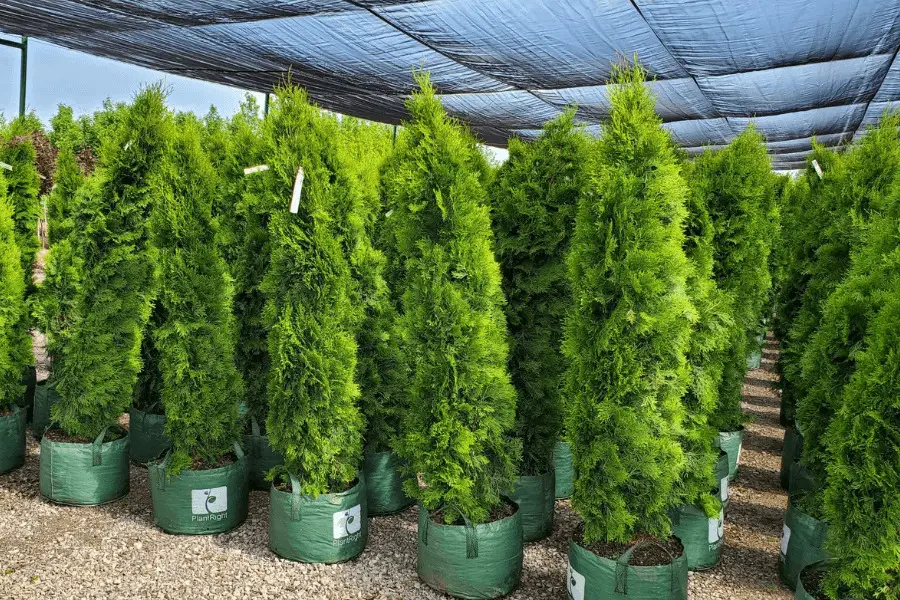
Cedar trees are known for their stately beauty and wonderful scent. They make an excellent addition to any landscape, providing shade, wind protection, and a habitat for wildlife. If you're looking to add some of these majestic trees to your property, transplanting them may be the way to go. In this blog post, we'll explore simple tips for transplanting cedar trees with ease, helping you achieve the best possible results.
Choosing the Right Cedar Tree
Before you begin transplanting your cedar trees, it's important to choose the right ones for your landscape. There are several factors to consider when selecting cedar trees, including their size, shape, and health.
- Size: Consider the size of the tree both now and when it's fully grown. Ensure that there's enough space in your landscape for the tree to reach its full potential without overcrowding other plants or structures.
- Shape: Look for a tree with a balanced, symmetrical shape. This will not only enhance its beauty but also ensure that the tree is structurally sound.
- Health: Examine the tree closely for signs of disease or insect infestations. A healthy tree will have a better chance of surviving the transplant process.
Timing is Everything
The success of transplanting a cedar tree largely depends on the timing. Knowing when to transplant your cedar tree can make all the difference.
- Best Time: The ideal time to transplant cedar trees is during the late fall or early spring when they are dormant. This allows the tree to focus its energy on establishing its roots in the new location.
- Avoid Hot Weather: Transplanting during hot weather can cause undue stress on the tree and may lead to transplant shock. To minimize the risk, transplant when temperatures are cooler.
Preparing the Tree for Transplantation
Properly preparing your cedar tree for transplantation is essential for its survival. Follow these simple tips to ensure a successful transplant:
- Water the Tree: In the days leading up to the transplant, water the tree generously. This will help to reduce the shock of being moved.
- Prune the Tree: Prune any dead or damaged branches, as well as any that may interfere with the transplant process. This will help the tree focus its energy on new growth after transplantation.
- Root Pruning: Root pruning can be beneficial if done several months before the transplant. This involves cutting through the roots around the tree to encourage new root growth closer to the trunk, making the tree easier to transplant.
Preparing the New Planting Site
It's important to have the new planting site prepared before you start the transplant process. Consider the following when preparing the site:
- Soil: Choose a site with well-draining soil. Cedar trees prefer slightly acidic soil, so you may need to amend the soil if it's too alkaline.
- Sunlight: Cedar trees thrive in full sun to partial shade. Make sure your chosen site provides the right amount of light for your tree.
- Space: Ensure that there's enough space for the tree's mature size. Consider the tree's height and width when fully grown.
- Dig the Hole: Dig a hole that's twice as wide and just as deep as the root ball of the tree. This will give the roots plenty of room to spread out and establish themselves.
Transplanting the Cedar Tree
With everything prepared, it's time to transplant your cedar tree. Follow these steps for a smooth and successful transplantation:
- Digging up the Tree: Carefully dig around the tree, starting about a foot away from the trunk. Work your way around the tree, gently lifting the root ball as you go. Be sure to keep as much of the root system intact as possible.
- Protect the Roots: Once the tree is free from the ground, wrap the root ball in a piece of burlap or a similar material. This will help to hold the roots together and prevent them from drying out during transport.
- Transport the Tree: Carefully move the tree to the new planting site, taking care not to damage the branches or roots. Use a wheelbarrow or other equipment if needed to minimize stress on the tree.
- Place the Tree in the Hole: Gently lower the tree into the prepared hole, making sure the top of the root ball is level with the surrounding soil. Adjust the depth of the hole as needed to achieve the correct height.
- Backfill the Hole: Fill in the hole around the root ball with the excavated soil, gently firming it down as you go. Make sure there are no air pockets, as these can cause the roots to dry out.
- Water Thoroughly: After the tree is planted, water it generously to help settle the soil and minimize transplant shock. Continue to water the tree regularly for the first year or two, especially during periods of dry weather.
Caring for Your Transplanted Cedar Tree
Proper care after transplantation is crucial for your cedar tree's survival and growth. Follow these tips to ensure your tree thrives in its new location:
- Mulch: Apply a 2-3 inch layer of organic mulch around the base of the tree, extending out to the drip line. This will help to conserve moisture, regulate soil temperature, and suppress weeds.
- Fertilize: Wait at least one year after transplanting to fertilize your cedar tree. Use a slow-release, balanced fertilizer and follow the manufacturer's instructions for application rates.
- Prune: Regularly prune your cedar tree to maintain its shape and health. Remove any dead or damaged branches, as well as any that are crossing or rubbing against each other. Prune in late winter or early spring when the tree is dormant.
- Pest and Disease Management: Monitor your cedar tree for signs of pests or diseases. Catching issues early and treating them promptly can help prevent more serious problems down the line.
- Provide Support: If your transplanted cedar tree is tall or top-heavy, consider staking it for the first year or two to provide extra support and prevent it from being uprooted during strong winds.
Troubleshooting Common Transplant Issues
Even with careful planning and execution, some cedar trees may experience difficulties after transplanting. Here are some common issues and their solutions:
- Transplant Shock: Symptoms include wilting, yellowing leaves, and slow growth. To minimize transplant shock, water the tree regularly and provide it with a supportive environment. Consider using a root stimulator or transplant tonic to encourage root growth and overall health.
- Root Rot: Overwatering or poorly draining soil can lead to root rot, a potentially fatal condition. Prevent root rot by ensuring proper drainage and adjusting your watering schedule accordingly.
- Insect Infestations: Cedar trees can be susceptible to various insect pests, such as aphids, spider mites, and borers. Monitor your tree for signs of infestation and treat with appropriate insecticides as needed.
- Disease: Cedar trees can be affected by various diseases, such as needle blight and root rot. Regularly inspect your tree for signs of disease and consult with a local arborist or extension agent for treatment recommendations.
Transplanting cedar trees can be a rewarding experience, adding beauty and value to your landscape for years to come. By following these simple tips and providing ongoing care, you can ensure that your cedar tree thrives in its new home. Remember, patience is key when it comes to transplanting trees, as it may take some time for them to fully establish and start to show significant growth. With proper planning, preparation, and care, your transplanted cedar tree will grow into a stunning addition to your landscape that you can enjoy for many years to come. So, don't be intimidated by the transplanting process – with a little effort and attention to detail, you can successfully transplant your cedar tree and watch it flourish in its new location.


